You can buy this pattern as a printable pdf file on Ravelry.
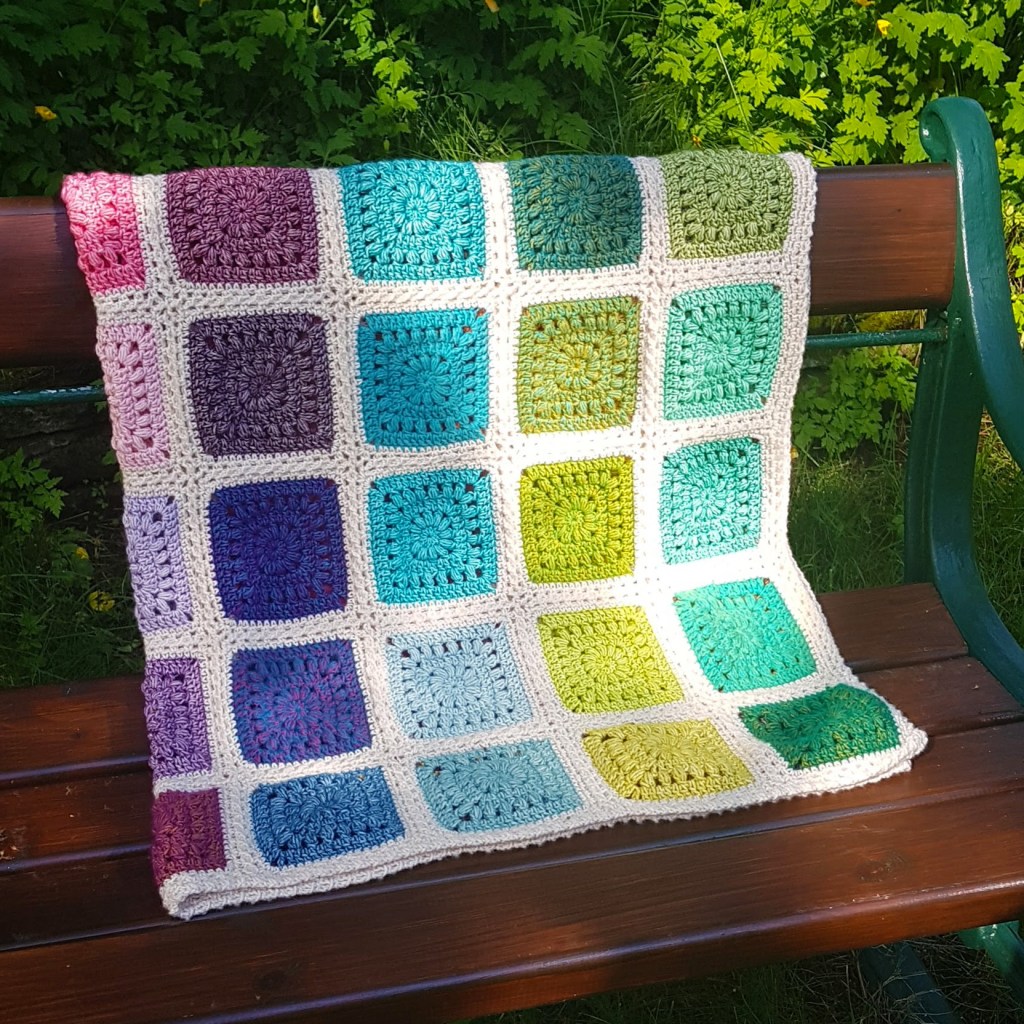
I made this blanket and pattern a few years ago after I got the Scheepjes Stone Washed & River Washed colour pack. So it fits the colour pack perfectly.
I was having a hard time choosing a name for this square blanket so I asked for suggestions on my yarn stores Facebook page. I got many good suggestions but the name Bifröst was what really got me.
In Norse mythology, Bifröst is a burning rainbow bridge that reaches between Miðgarður (earth) and Ásgarður (the realm of the gods). According to the Prose Edda, an Old Norse work of literature written in Iceland during the early 13th century, the bridge ends in heaven at Himinbjörg, the residence of the god Heimdallur, who guards it from the jötnar.
Materials:
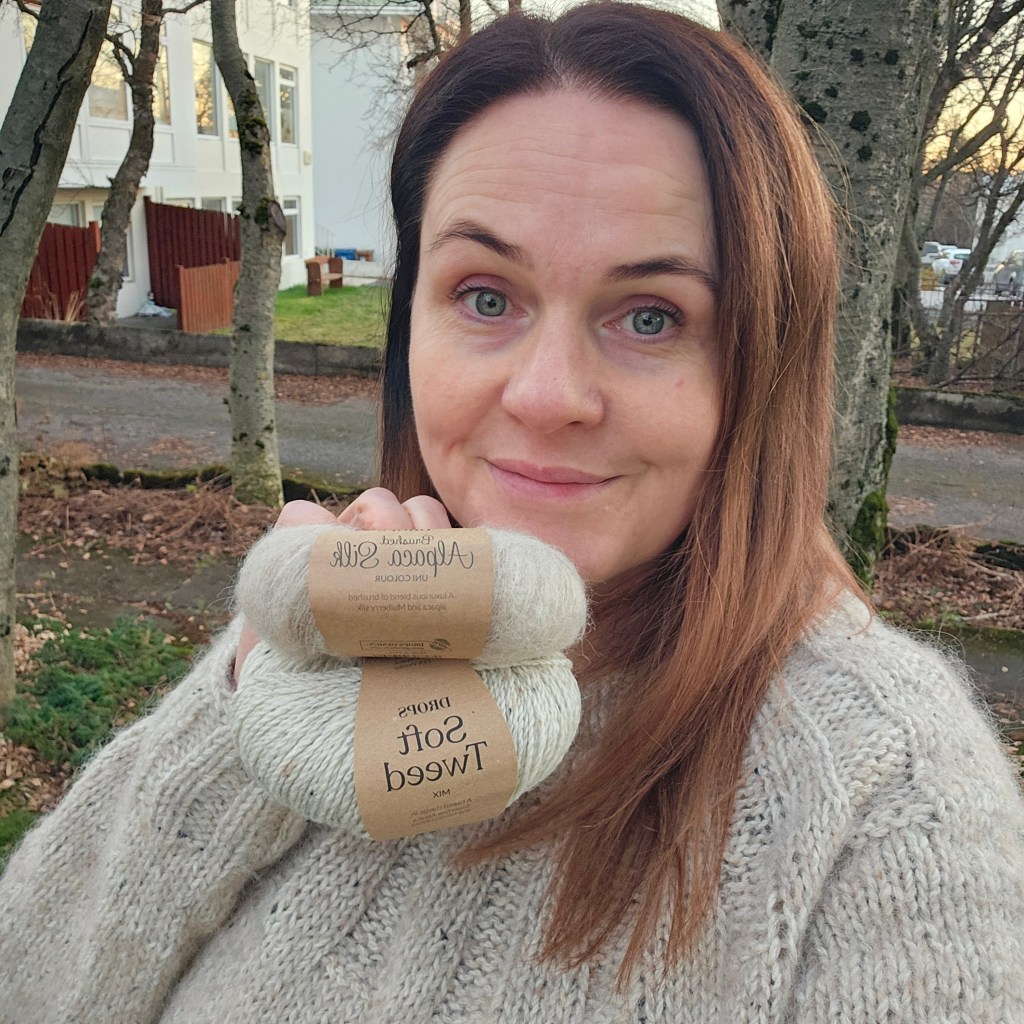
Yarn: 1 x Scheepjes Stone Washed & River Washed Colour Pack
4 x Scheepjes Stone Washed, colour no 801 – Moon Stone
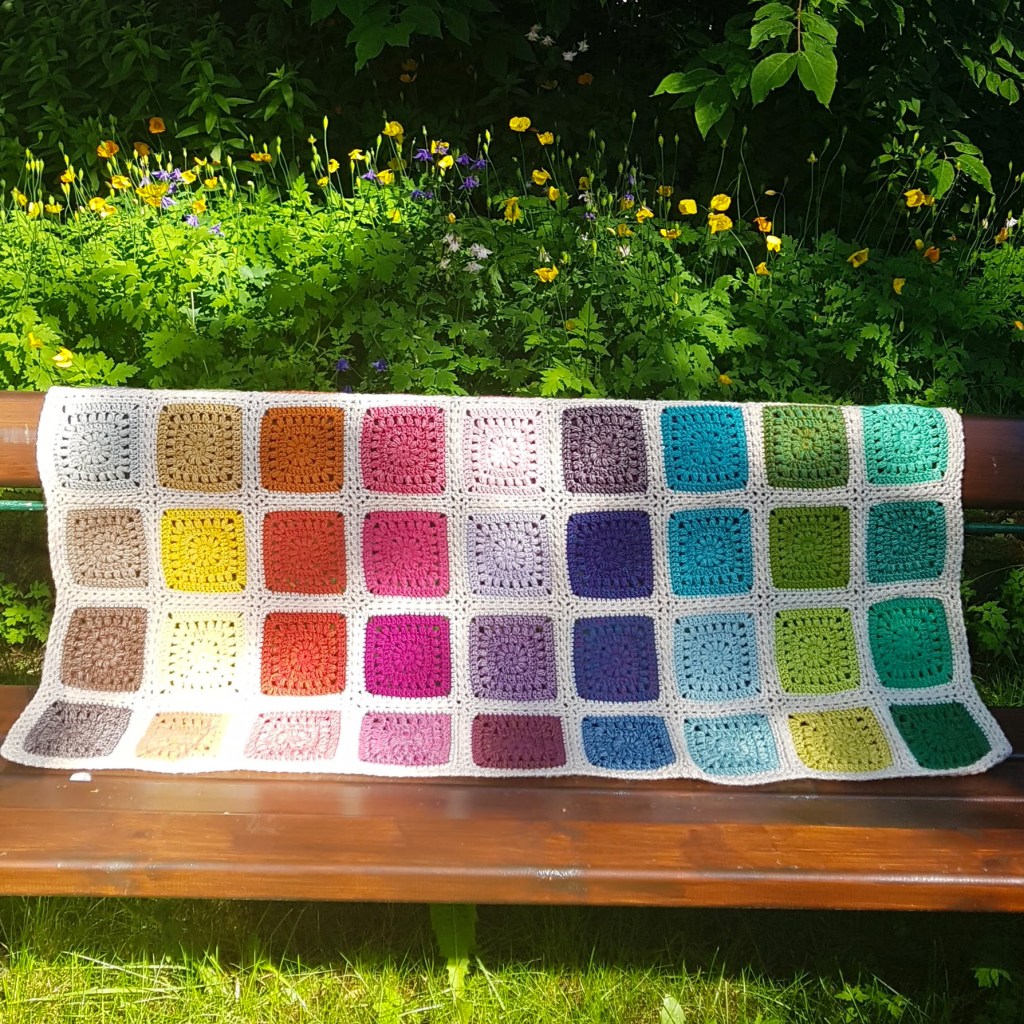
For my blanket I used the Scheepjes Stone Washed & River Washed colour pack. It has 58 mini skeins, 10 g of each colour. It was so amazing to be able to crochet with ALL the colours and not having to choose between them.
Each square is about 9 g so if you will be using 50 g skeins you will need about 10 skeins for the squares. Then you need 4 skeins for the joining and the border.
Crochet hook: 4 mm, or the size needed to get the gauge.
Gauge: 16 double crochet stitches – 10 cm, before washing.
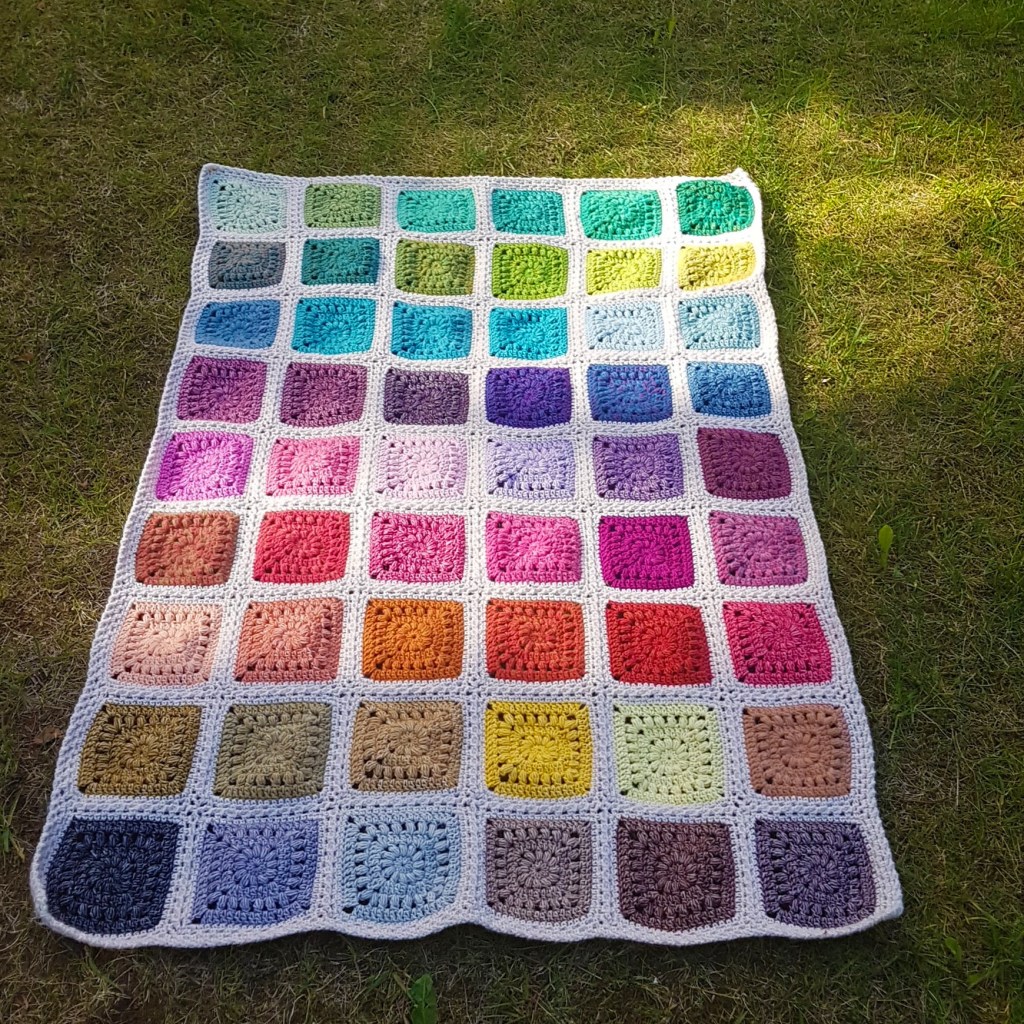
Size: ca 85 cm wide and 130 cm long. Each square is about 11,5 x 11,5 cm without the white border.
I use meters and grams as a unit of measurements. I don’t have any sense for other ways to measure, and because of that I don’t feel confident in converting my measurements to inches or ounces or anything else. Hope you don’t mind having to do that yourself.
Detailed explanations of stitches:
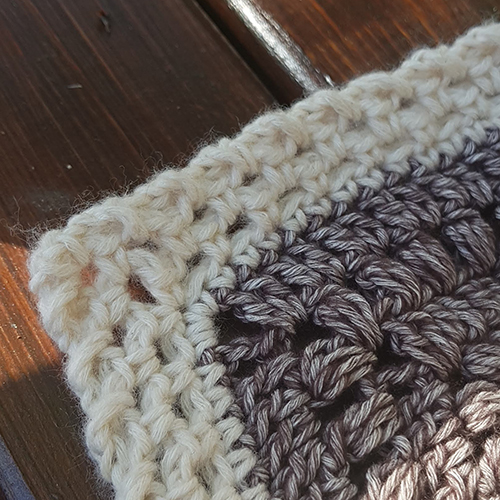
Puff stitch:
Yarn over, insert the hook in the stitch, yarn over, draw the yarn through the stitch and draw the loop up to about 1 cm height, *yarn over, insert the hook into the same stitch, yarn over, drag the yarn through the stitch and up to the same height as the previous loop*, repeat from * to * once more, then you have 7 loops on the hook, yarn over and draw through 6 loops, then you have 2 loops on the hook, yarn over and draw through last 2 loops.
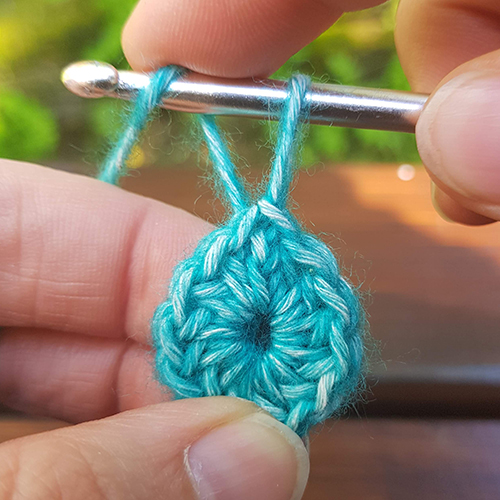
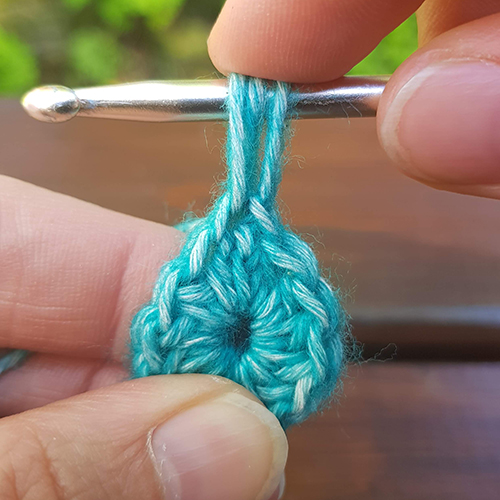
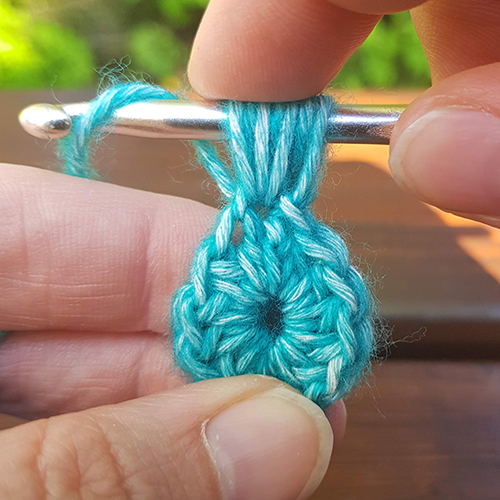
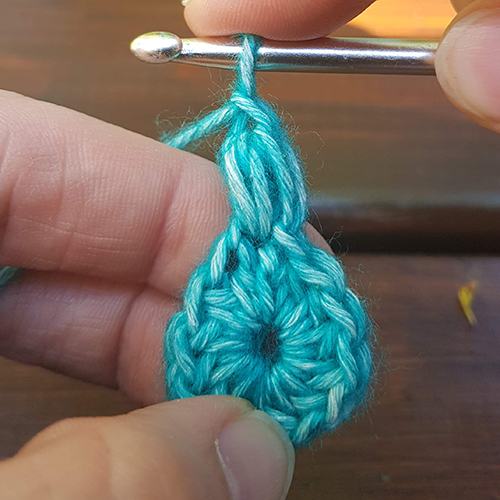
Beg-puff stitch:
Draw the loop on the hook up to about 1 cm height, * yarn over (1st photo), insert the hook into the same stitch as the slip stitch was made in, yarn over, draw the yarn through the stitch and up to the same height as previous loop (2nd photo)* repeat from * to * twice more, then you have 7 loops on the hook (3rd photo), yarn over and draw through all 7 loops, close the beg-puff with ch 1 (4th photo).
Round closed with a single crochet:
This is done so the next round starts in the middle of a corner. If you have never done this before it might feel strange, but you get used to it fast and I’m sure you’re going think it’s pure genius.
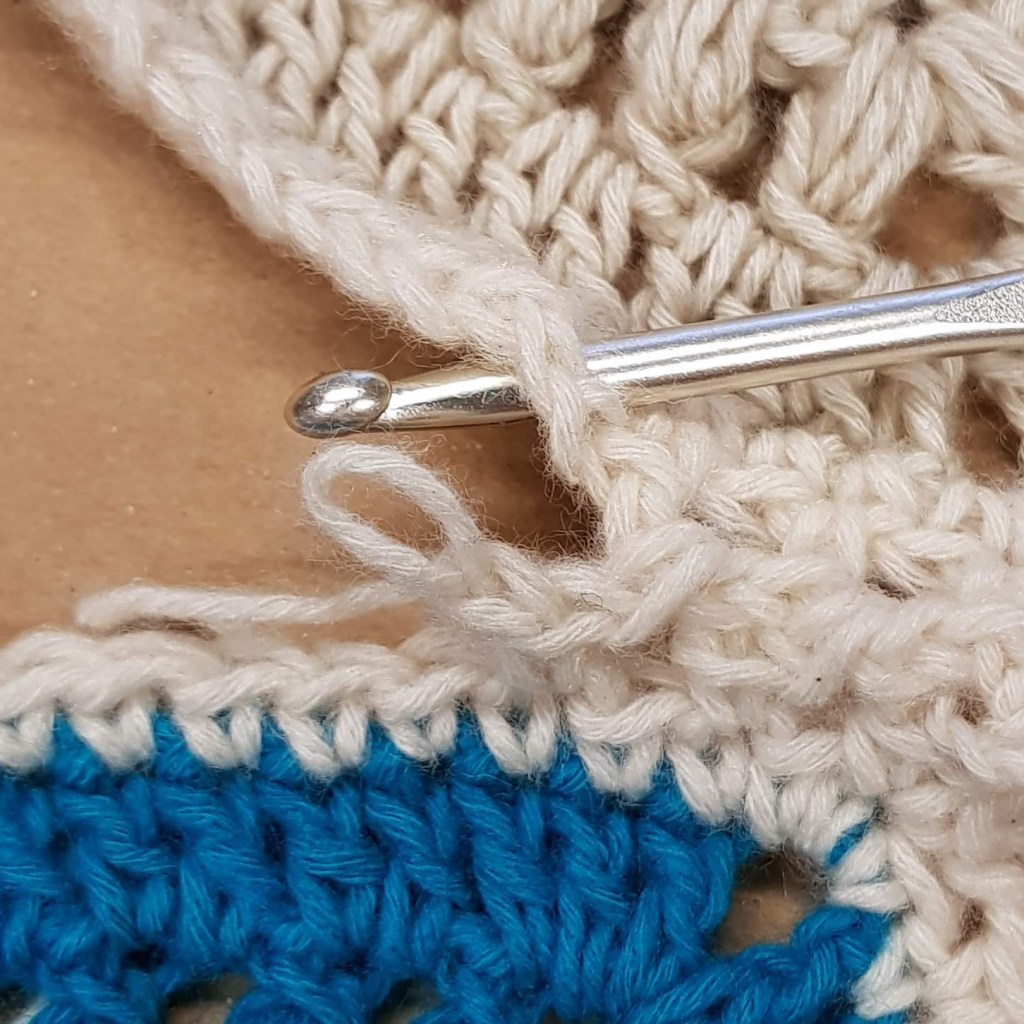
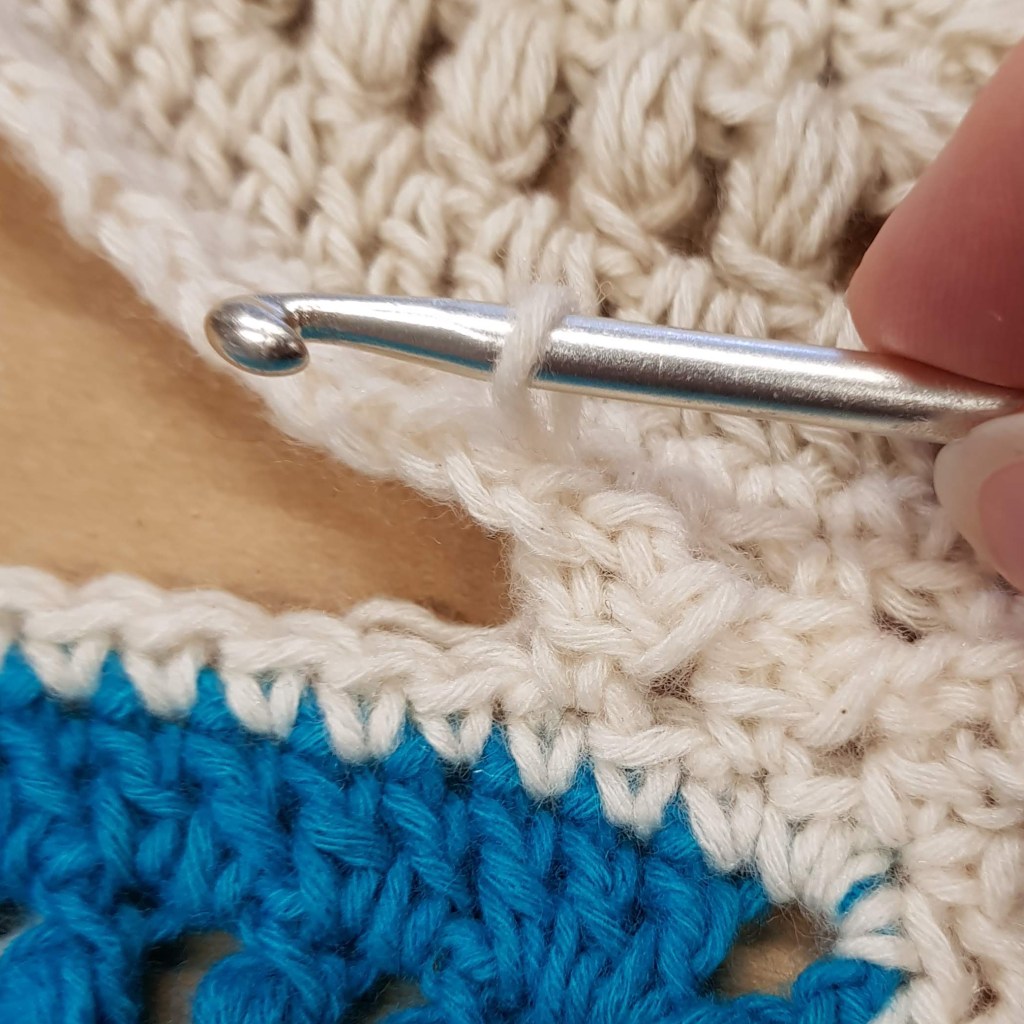
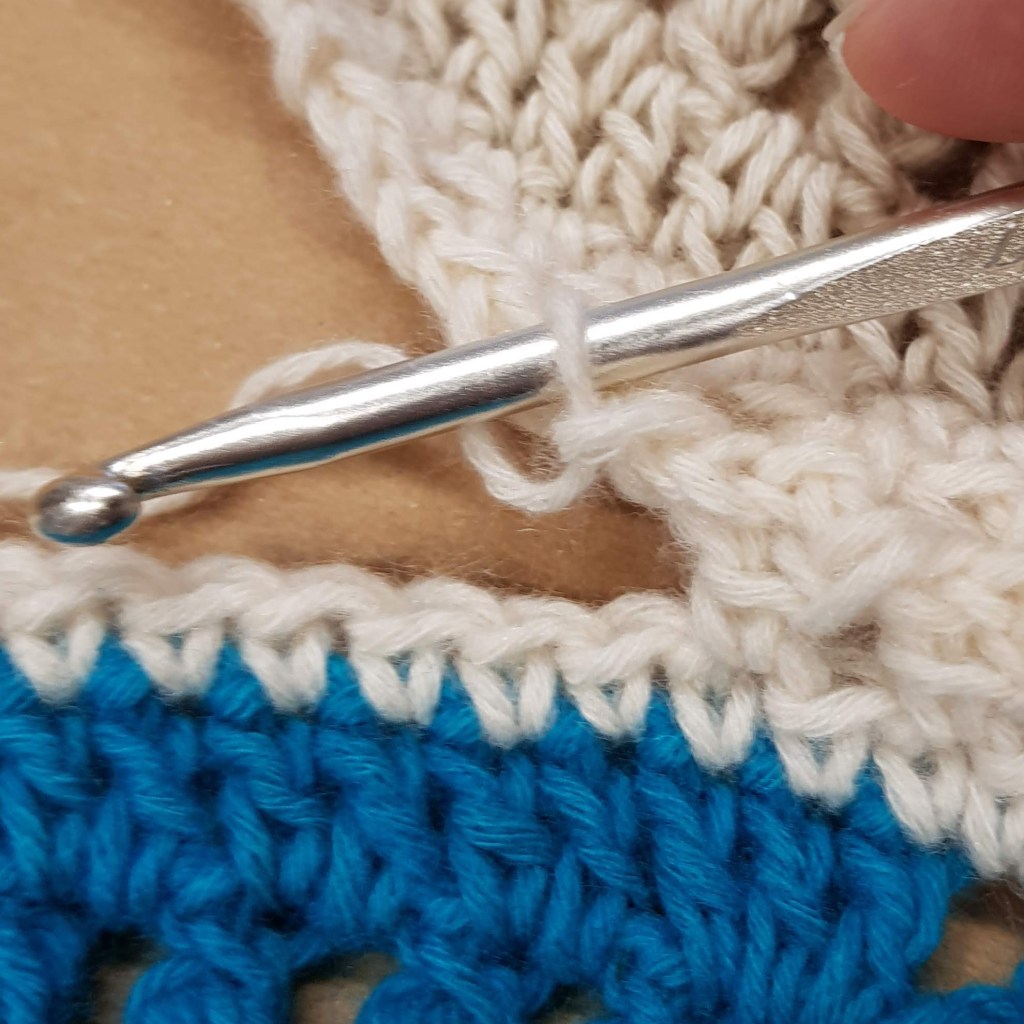
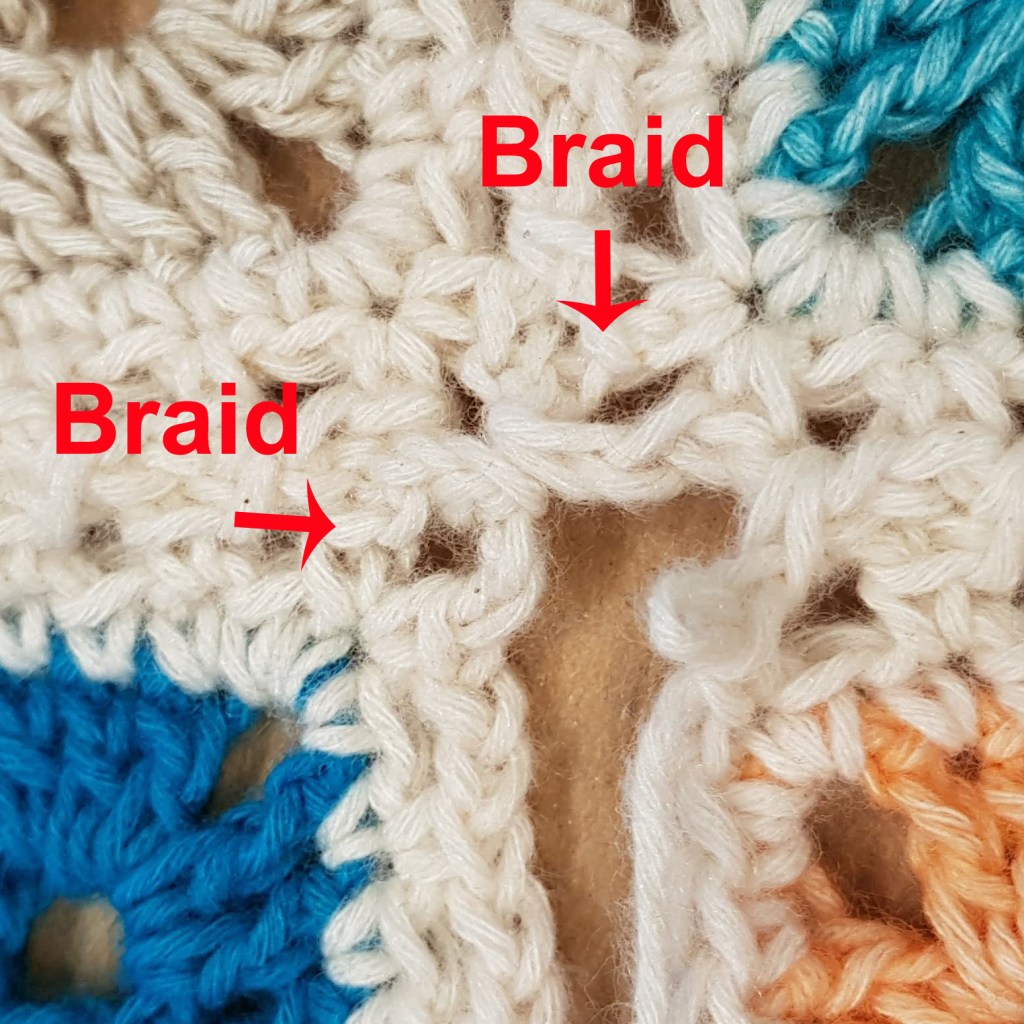
Braid:
Take the loop off the hook and leave it loose in the air, insert the hook from the front into the chain space on the next square (1st photo), put the loose loop back on the hook and draw it through the chain space (2nd photo), keep crocheting according to pattern (3rd photo).
Twisted single crochet:
Twisted sc’s are brilliant. They are almost the same as regular sc’s, apart from this one thing – a twist.
Insert the hook in the stitch to be worked, yarn over, draw back through stitch, now you have 2 loops on your hook, it’s best to have them a little loose, turn your hook in a full 360° circle, doesn’t matter which way, now the 2 loops on the hook have a twist, yarn over, draw back through both loops. And you have made a twisted sc.
If you find that it is to difficult to draw back through the loops after you twist them they are to tight, loosen them up a bit before you twist them and the drawn back should go smoother.

The pattern:
Abbreviations US:
st – stitch, ch – chain, ch-sp – chain space, sl st – slip stitch, sc – single crochet, hdc – half double crochet, dc – double crochet.
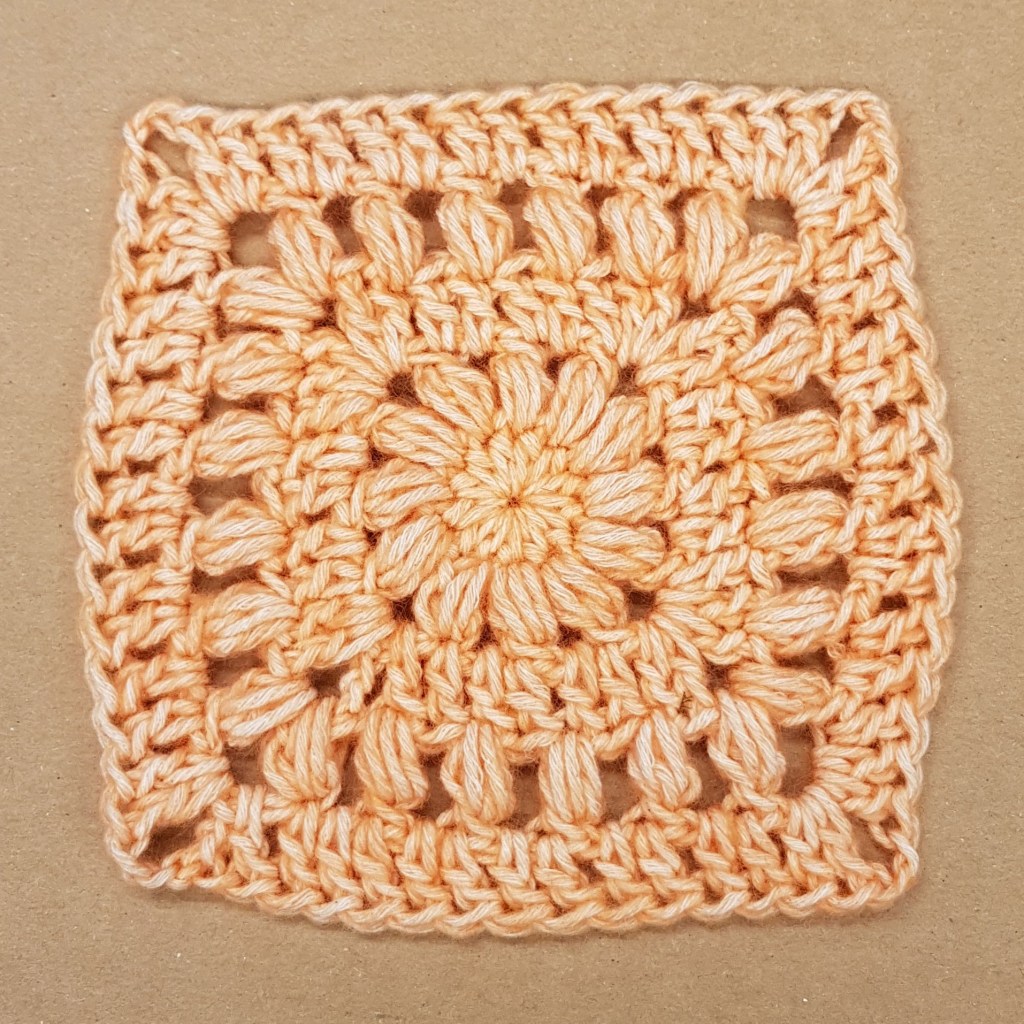
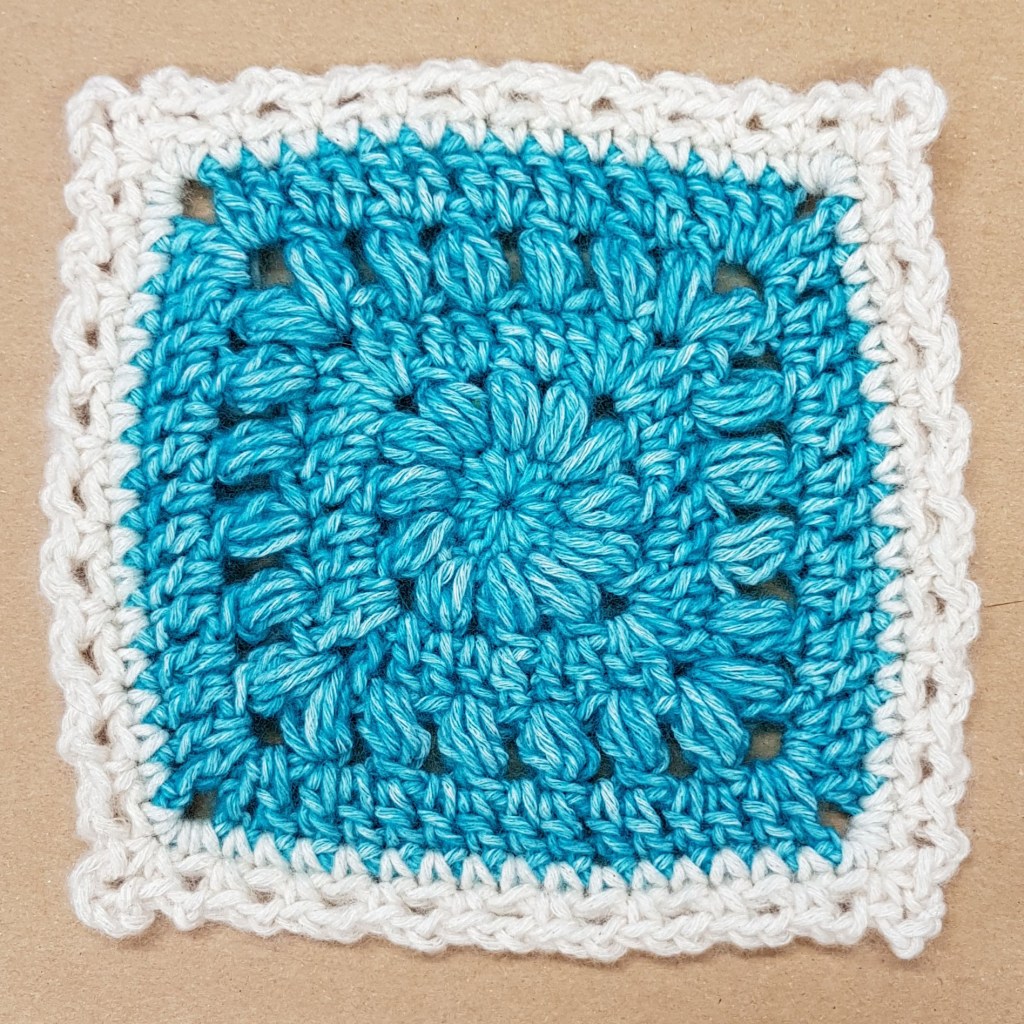
The square:
Make a magic loop.
Rnd 1: Ch 2 (does not count), 12 hdc into the magic loop, join with a sl st in 1st hdc. (12 hdc)
Rnd 2: Make beg-puff (see special stitches), *ch 1, 1 puff in next st*, repeat from * to * 10 more times, join with a sc in beg-puff. (12 puffs + 12 ch-sp)
Rnd 3: Ch 3 (counts as 1st dc), 1 dc in ch-sp (space made with joining-sc), 1 dc in next 5 st (puff and ch-sp), *[2 dc, ch 2, 2 dc] in next ch-sp, 1 dc in next 5 st*, repeat from * to * 2 more times, 2 dc in last ch-sp, ch 1, join with a sc in 3rd ch of beg-3. (9 dc on each side + 4 ch-sp corners)
Rnd 4: Make beg-puff, *ch 1, skip 1 st, 1 puff in next st*, repeat from * to * 3 more times, ch 1, skip 1 st, **[1 puff, ch 2, 1 puff] in corner ch-sp, *ch 1, skip 1 st, 1 puff in next st*, repeat from * to * 3 more times, ch 1, skip 1 st**, repeat from ** to ** 2 more times, 1 puff in last corner ch-sp, ch 1, join with a sc in beg-puff. (6 puffs on each side + 4 ch-sp corners)
Rnd 5: Ch 3 (counts as 1st dc), 1 dc in ch-sp (space made with joining-sc), 1 dc in next 11 st (puff and ch-sp), *[2 dc, ch 2, 2 dc] in next corner ch-sp, 1 dc in next 11 st*, repeat from * to * 2 more times, 2 dc in last corner ch-sp, ch 2, join with a sl st to 3rd ch of beg 3 OR cut thread and do an invisible join with a needle when weaving in the end.
Cut thread and change color. If you are making the square in single color then join rnd 5 with ch 1 and a sc in beg-puff.
Information on the color layout is in the end of this pattern 😊
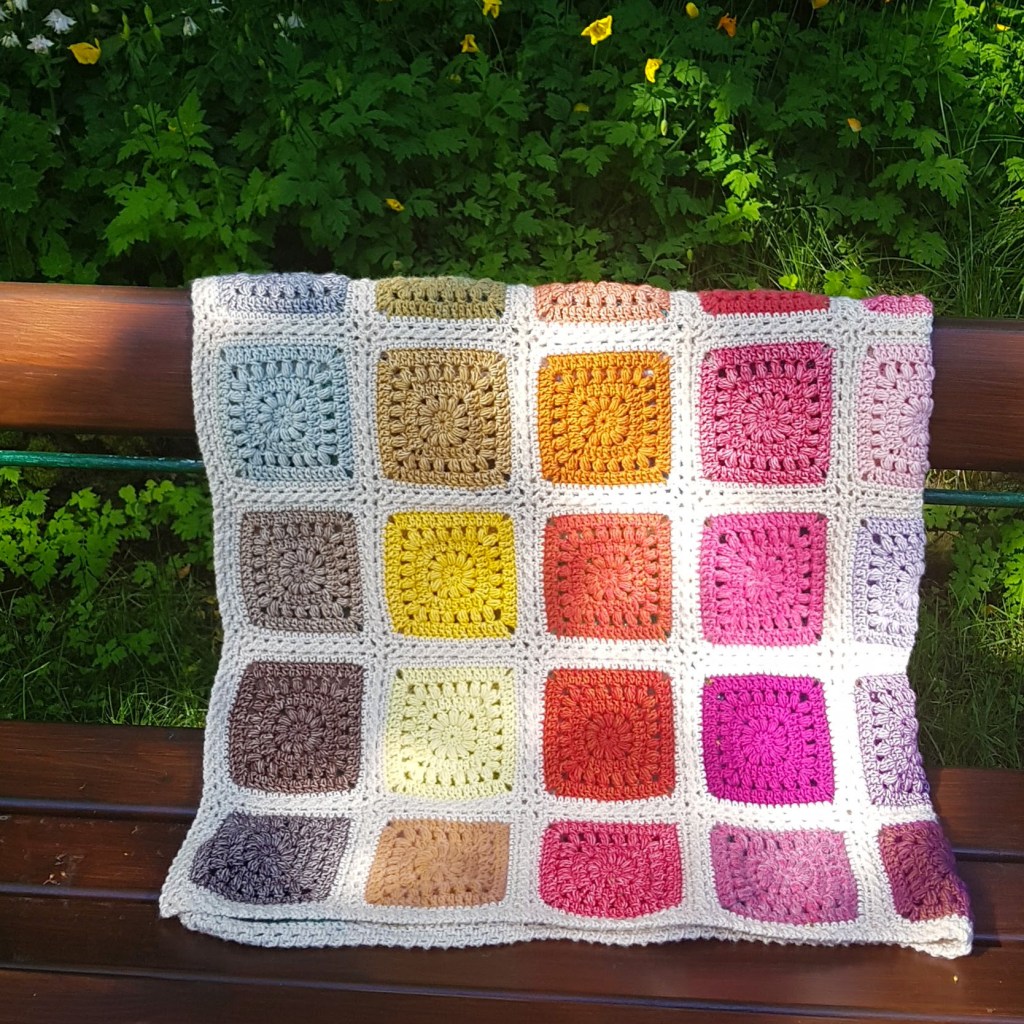
Adjust it:
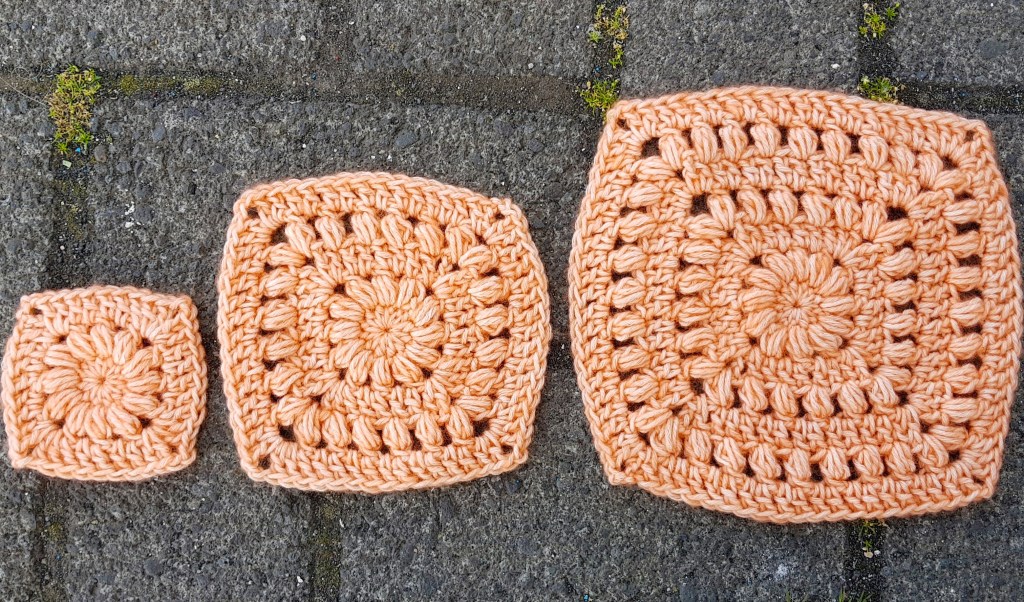
I’m a big fan of “adjustable patterns” because I like being able to do my own thing when it comes to crochet. So I did the math and made the pattern of these squares in a way that it’s possible to change the size of them, without having any trouble when joining them or doing the border. The pattern is written for the square that’s in the middle, but like you can see in the photo you can also make them smaller and larger.
For the smaller square you only crochet the first 3 rounds of the pattern. For a bigger square you repeat rounds 4 and 5 until the square is as big as you want
Joining the squares:
I join the squares with a Flat Braid Join, in that method you braid/crochet the squares together in the last row, so it’s a join as you go method. This way of joining squares is actually quite fun and the outcome is just beautiful. I found it much more difficult to explain the method then actually crocheting it. So if this seems a bit complicated at first don’t give up and remember the special stitch explanation in the beginning of the pattern.
First square
This one is only done once, and is really the corner stone of the blanket.
Rnd 1: With a new color, join with a sl st in any ch-sp corner, ch 1, 2 sc in ch-sp, *1 sc in next 15 st, 3 sc in ch-sp corner*, repeat from * to * to the end of the rnd, 1 sc in last/first ch-sp corner, join with a sl st in 1st sc.
Rnd 2: Ch 1, 1 sc in same st as sl st was made, **ch 4, 1 sc in same st as prev sc (corner made), *ch 2, skip 1 st, 1 sc in next st*, repeat from * to * 8 more times**, repeat from ** to ** to the end of the rnd, join with a sl st in 1st sc. Cut thread.
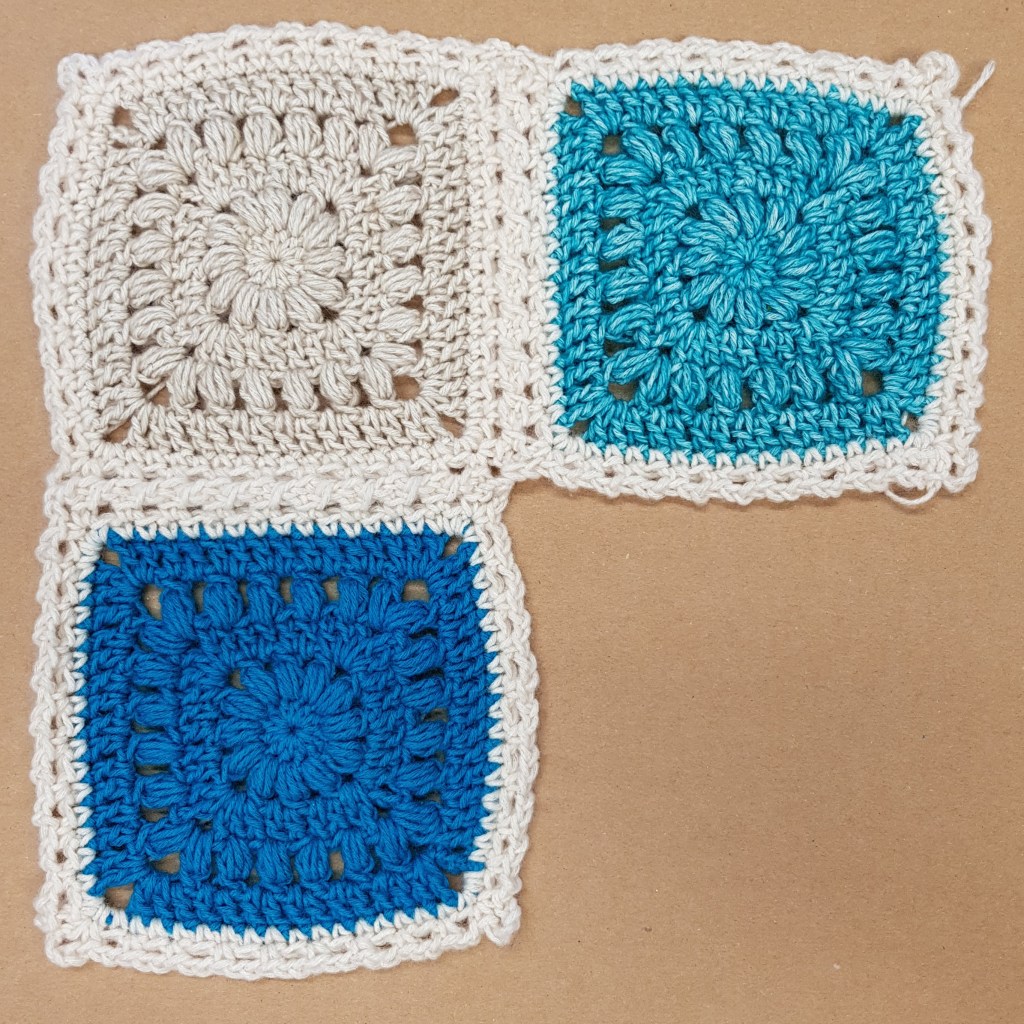
Second square:
Is done to add rows to the blanket.
Rnd 1: With a new color, join with a sl st in any ch-sp corner, ch 1, 2 sc in ch-sp, *1 sc in next 15 st, 3 sc in ch-sp corner*, repeat from * to * till the end of the rnd, 1 sc in last/first ch-sp corner, join with a sl st in 1st sc.
Rnd 2: Crochet like in rnd 2 of first square to 3rd corner, then you start the braiding. Ch 2, braid (see special stitches), ch 2, 1 sc in same st as prev sc (corners braided together), *ch 1, braid, ch 1, skip 1 st, 1 sc in next st*, repeat from * to * to next corner, ch 2, braid, ch 2, 1 sc in same st as prev sc, crochet like in first square to end of rnd.
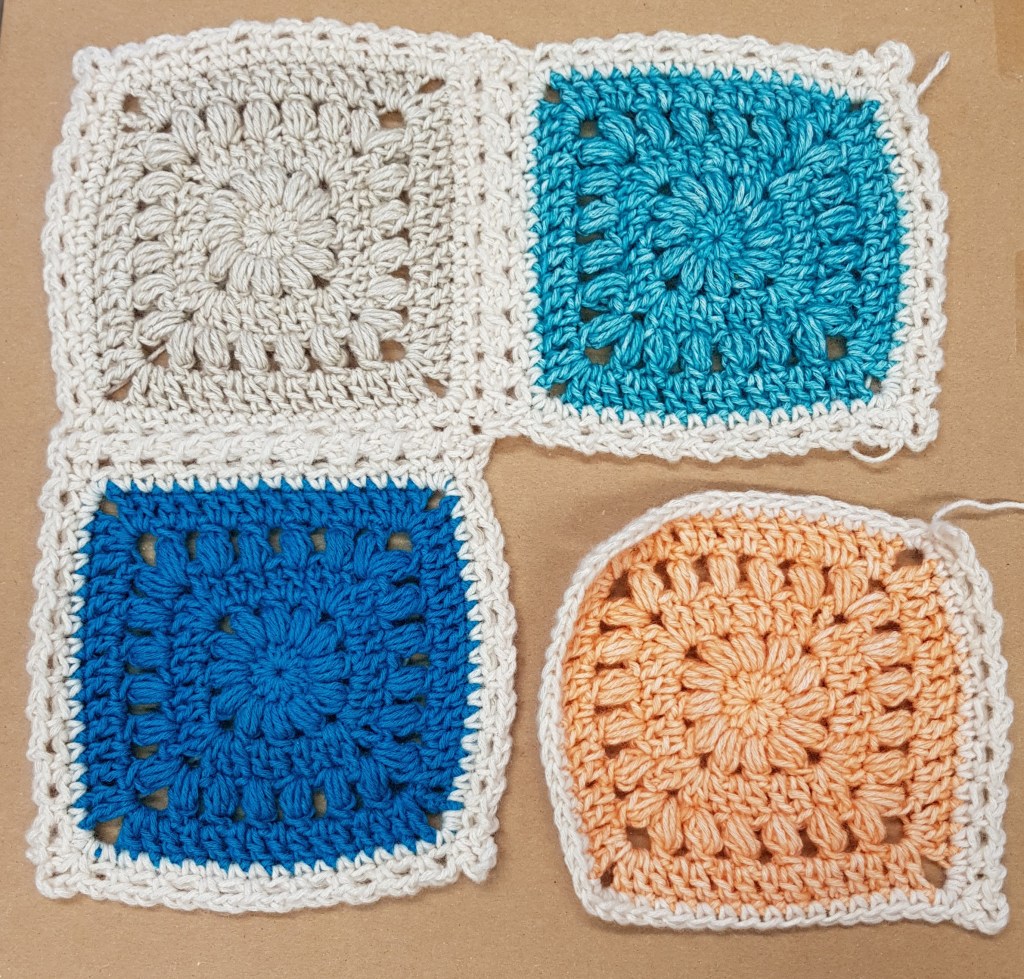
Third square:
Is the most common of them all because it’s the filler upper and is braided together with 2 other squares in the same round.
Rnd 1: With a new color, join with a sl st in any ch-sp corner, ch 1, 2 sc in ch-sp, *1 sc in next 15 st, 3 sc in ch-sp corner*, repeat from * to * till the end of the rnd, 1 sc in last/first ch-sp corner, join with a sl st in 1st sc.
Rnd 2: Crochet like in rnd 2 of first square to the 2nd corner, then you start braiding. Ch 2, braid, ch 2, 1 sc in same st as prev sc, *ch 1, braid, ch 1, skip 1 st, 1 sc in next st*, repeat from * to * to next corner (see photo), ch 2, braid, ch 1, braid to corner of next square, ch 2, 1 sc in same st as prev sc, *ch 1, braid, ch 1, skip 1 st, 1 sc in next st* repeat from * to * to last corner, ch 2, braid, ch 2, 1 sc in same st as prev sc, crochet like in first square to end of rnd.
Border:
When I was making the border I wanted it to be simple. The squares are beautiful and it might just be too much if I added a frilly border as well.
Rnd 1: Join with a sl to 1st ch-sp after a corner, *ch 2, 1 sc in each ch-sp* the whole rnd, except in the corners make *1 sc, ch 4, 1 sc in same ch-sp*, join with a sl st to 1st sc
Rnd 2: Sl st in next ch-sp, ch 1, 1 twisted sc in ch-sp, *ch 1, 1 twisted sc in each ch-sp*, the whole rnd, except in the corners make *ch 1, 1 twisted sc, ch 1, 1 twisted sc in same ch-sp*, join with a sl st to 1st sc OR cut thread and do an invisible join with a needle when weaving in the end.
Color layout:
58 mini skeins in the colour pack but only 54 squares in the blanket. So if a color isn’t on the list it means that I didn’t use it in my blanket.
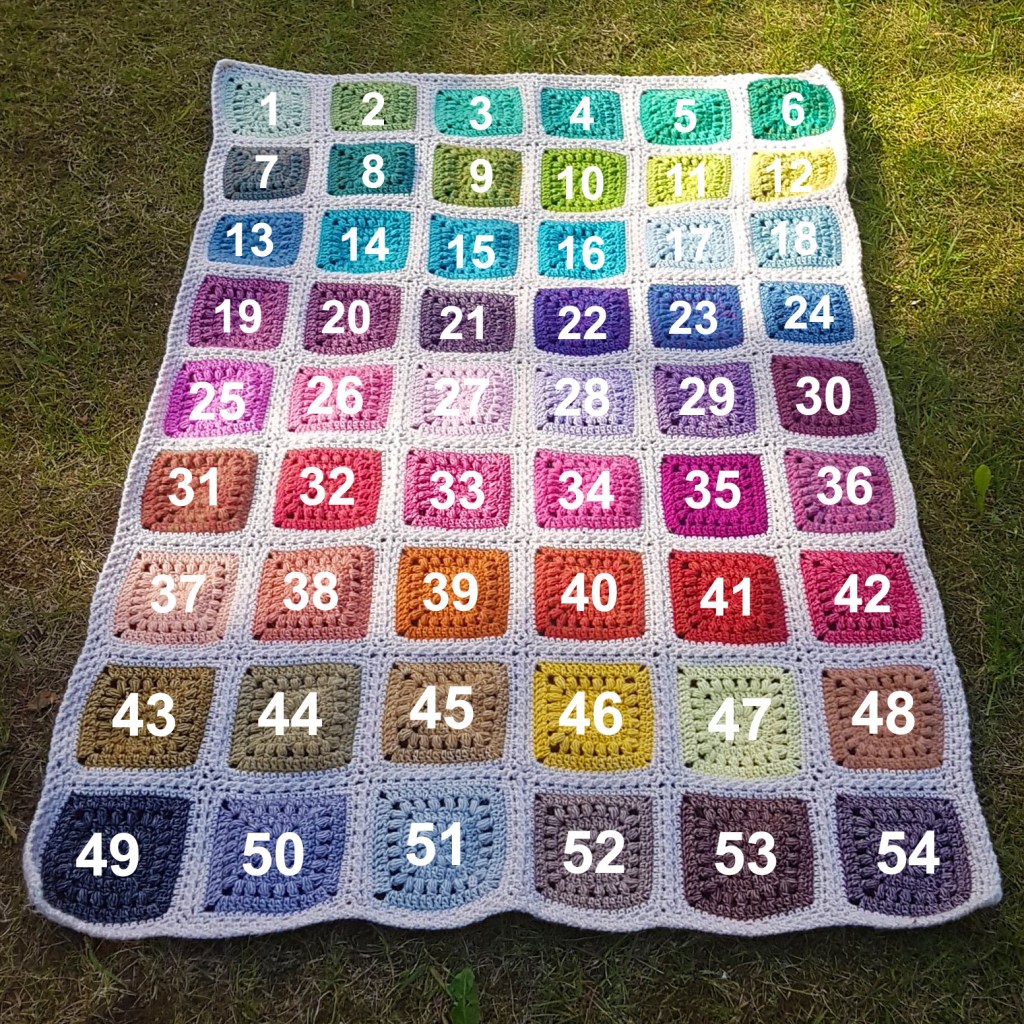
(SW) = Scheepjes Stone Washed – (RW) = Scheepjes River Washed
1. 819 – New Jade (SW)
2. 806 – Canada Jade (SW)
3. 826 – Fosterite (SW)
4. 825 – Malachite (SW)
5. 954 – Congo (RW)
6. 955 – Po (RW)
7. 953 – Severn (RW)
8. 958 – Tiber (RW)
9. 951 – Amazon (RW)
10. 962 – Narmada (RW)
11. 827 – Peridot (SW)
12. 812 – Lemon Quartz (SW)
13. 950 – Wheaton (RW)
14. 824 – Turquoise (SW)
15. 952 – Rhine (RW)
16. 815 – Green Agate (SW)
17. 813 – Amazonite (SW)
18. 828 – Larimar (SW)
19. 808 – Corundum Ruby (SW)
20. 810 – Garnet (SW)
21. 830 – Lepidolite (SW)
22. 949 – Yarra (RW)
23. 941 – Colorado (RW)
24. 805 – Blue Apatite (SW)
25. 836 – Tourmaline (SW)
26. 835 – Rhodochrosite (SW)
27. 820 – Rose Quartz (SW)
28. 818 – Lilac Quartz (SW)
29. 811 – Deep Amethyst (SW)
30. 957 – Eisack (RW)
31. 947 – Seine (RW)
32. 946 – Mississippi (RW)
33. 807 – Red Jasper (SW)
34. 943 – Mekong (RW)
35. 942 – Steenbras (RW)
36. 945 – Ganges (RW)
37. 834 – Morganite (SW)
38. 816 – Coral (SW)
39. 961 – Mersey (RW)
40. 944 – Nile (RW)
41. 956 – Avon (RW)
42. 823 – Carnelian (SW)
43. 832 – Enstatite (SW)
44. 959 – Ural (RW)
45. 809 – Yellow Jasper (SW)
46. 833 – Beryl (SW)
47. 817 – Citrine (SW)
48. 960 – Murray (RW)
49. 803 – Black Onyx (SW)
50. 802 – Smokey Quartz (SW)
51. 814 – Crystal Quartz (SW)
52. 804 – Boulder Opal (SW)
53. 822 – Brown Agate (SW)
54. 829 – Obsidian (SW)
Before you go!
For pattern support please email me at fidgetyhandscrochet@gmail.com
Hope you enjoyed making your Bifröst squares as much as I did! If you post a photo on Instagram please tag me @fidgetyhands and/or use the hashtag #BifrostSquares & #FidgetyHandsCrochet – I love seeing what you make 😊
© FidgetyHandsCrochet 2019, Elín Guðrúnardóttir
Please respect my work and do not copy or redistribute this pattern.


Leave a comment